
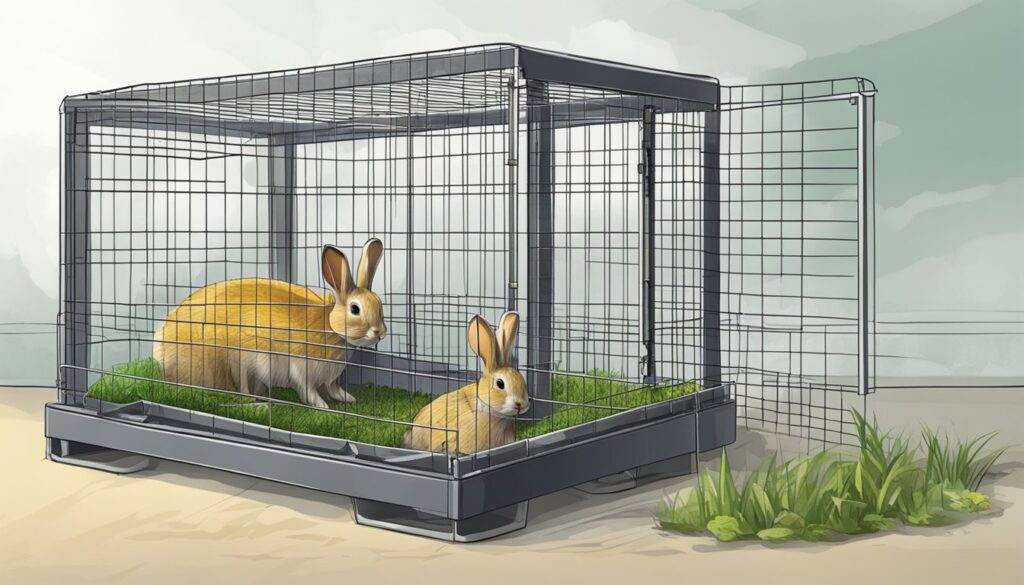
Creating a DIY urine guard for your rabbit cage is a practical solution to maintain cleanliness and hygiene in your rabbit’s living space.
These guards help direct waste into the bedding area, making it easier for you to keep the cage clean and ensuring your rabbit’s habitat is comfortable and sanitary.
With a few materials and simple tools, you can build an effective urine guard tailored to the size and shape of your rabbit’s cage.
Constructing your own urine guard not only saves money but also allows you to customize the design to best fit your rabbit’s specific needs.
By using materials such as sheet metal, you can create a urine guard that is both durable and easy to install.
With careful planning and execution, you can ensure that your rabbit’s cage remains dry and odor-free, contributing to the overall well-being of your pet.
Key Takeaways
- DIY urine guards enhance cage cleanliness and comfort for rabbits.
- Customizing a urine guard allows for better fit and effectiveness.
- Proper maintenance of the urine guard ensures long-term durability and hygiene.
Understanding Urine Guards
Urine guards are essential for maintaining a clean and hygienic environment for your rabbit. They also provide additional benefits such as privacy and could contribute to the thermal comfort of the cage.
Purpose and Benefits
Urine guards serve a crucial role in containing messes within your rabbit’s dwelling.
They’re designed to prevent urine from escaping the cage and ending up on your floors or walls, which helps maintain sanitation and reduces cleaning efforts.
Some urine guards also offer an aspect of privacy for your rabbit, as they can block the view into their resting areas.
Moreover, certain materials used for guards may have beneficial thermal properties, reflecting heat back into the cage during colder months.
Benefits of Urine Guards:
- Reduces the frequency of cleaning
- Maintains cleanliness by containing urine splashes
- Offers privacy for your rabbit
- May have thermal benefits depending on the material
Types and Materials
Urine guards can be fashioned from various materials, including wire, plastic, wood, or metal.
Wire guards are breathable and allow for good air circulation but might not be as effective in preventing urine from leaking.
Plastic guards are lightweight and easy to clean but may not be as durable as metal alternatives. Wood can offer a sturdier option, but it must be treated to prevent damage from moisture.
In contrast, metal guards, often made of galvanized steel, are robust and effective; however, they may require additional bedding or padding to protect your rabbit’s feet from the hard surface.
From a vet’s perspective, the material you choose can influence not only hygiene but also the comfort and well-being of your rabbit.
| Materials | Pros | Cons |
|---|---|---|
| Wire | Good ventilation, affordable | Less containment for urine splash |
| Plastic | Easy to clean, lightweight | Less durable, may need replacement |
| Wood | Sturdy, offers more coverage | Needs treatment, harder to clean |
| Metal | Durable, effective containment | Potentially harsh on rabbit’s feet |
In my experience, the choice of material often comes down to individual needs and circumstances.
For instance, a rabbit that tends to chew might not do well with plastic guards, while those in colder environments might benefit from the added insulation metal or wood can provide.
Remember, whatever type you choose, the fit is crucial – it should be snug against the cage to prevent any leakages.
Planning Your DIY Urine Guard For Your Rabbit’s Cage
Before you start crafting a urine guard for your rabbit’s cage, it’s essential to consider the specific design and gather all necessary tools and materials.
This preparation will ensure that the urine guard functions effectively, keeping your rabbit’s habitat clean and your space urine-free.
Design Considerations
When designing your DIY urine guard, measurements are crucial for a snug fit around your rabbit’s cage. You’ll need to measure the perimeter of the cage and decide on the height of the guards.
Typical urine guards are about 4 to 8 inches high. To maintain originality and suit the needs of different rabbit breeds, you might adjust the dimensions.
Materials are equally important.
Most urine guards are made from materials like metal or plastic sheeting, but wood such as plywood or lumber can also be used, especially if you’re looking for a more natural look or have these supplies readily available at home.
However, wood might not be as durable or easy to clean as metal or plastic. Chicken wire is not suitable for urine guards as it does not provide a solid barrier.
Remember, you’re aiming to create a barrier that prevents urine from spraying outside the cage, so choose materials that are urine-resistant and easy to clean.
Required Tools and Materials
To construct a urine guard, you’ll need the following tools and materials:
- Measuring tape for accurate cage measurements
- Saw or pliers if you’re cutting wood or metal
- Wire or zip ties to attach the guard to the cage
- Pre-cut materials are available at stores like Home Depot if you prefer not to cut them yourself
In terms of materials, you’ll need:
- Metal or plastic sheeting
- Wood (optional, if preferred)
From my experience as a vet, using pliable materials is essential since some rabbits will chew on anything they can reach. Metal guards are more durable and resist this common bunny behavior, ensuring longevity and less frequent replacements.
Remember to wear safety equipment such as gloves while handling sharp tools and materials. Always prioritize the safety and well-being of your rabbit when selecting materials, opting for non-toxic and burr-free options.
Building Basics
When constructing a DIY urine guard for your rabbit’s cage, the focus is on ensuring the safety and efficiency of your build. You’ll need to gather appropriate materials and follow a clear set of steps.
Safety Precautions
Before beginning, it’s crucial to prioritize your safety and the well-being of your rabbit. Equip yourself with the necessary safety gear:
- Gloves
- Safety goggles
- Mask (if working with materials that produce dust or fumes)
Ensure the area is well-ventilated, especially if using glue or substances that emit fumes. When operating power tools like a cordless drill, maintain a steady hand and be aware of your surroundings to avoid accidents.
Construction Steps
Now, let’s start building. First, gather your hand tools and materials:
- Tape measure
- Screwdriver set
- Hammer
- Cordless drill
| Step | Tool | Material | Action |
|---|---|---|---|
| 1 | Tape measure | Measure the perimeter of the cage. | |
| 2 | NA | Flashing | Cut to the measured length for a snug fit. |
| 3 | Hammer | Nails | Secure the guards to the corners of the cage. |
| 4 | Screwdriver | Screws | Further stabilize with screws if necessary. |
Measure the perimeter of the cage accurately with a tape measure. Cut the material you chose for the urine guard, like metal flashing or plastic sheets, with proper cuts to fit around your rabbit cages’ dimensions.
Fasten the material securely to the cage to prevent slips or gaps; you can use nails, screws, or non-toxic glue—each has its benefits.
For instance, screws can be easily removed for cleaning, while glue offers a more seamless look but might require more time to set properly. When using tools like a hammer or drill, do so with precision to avoid damaging the cage or injuring yourself.
From my experience as a vet, I’ve seen many rabbit owners successfully build urine guards that greatly reduce cleanup and keep their pets snug and dry.
Remember that a well-built guard not only keeps your space clean but also contributes to the health and comfort of your furry friend.
Assembling the Urine Guard
Crafting a urine guard for your rabbit’s cage involves precise cutting, secure fastening, and protective finishing. You’ll ensure the cage stays clean and your bunny remains healthy.
Cutting and Measuring
Firstly, measure the length and height of your cage’s sides to determine the size of the materials you need. Using a tape measure, ascertain the dimensions for the metal or wood to create the guards.
If you choose metal, a saw or metal snips will be required for cutting, whereas wood can be cut using a standard saw. Aim for a height that effectively prevents urine from escaping, generally between 4 to 6 inches tall.
| Step | Tool | Measurement | Material |
|---|---|---|---|
| 1. | Tape measure | Length & Height of cage sides | Metal/Wood |
| 2. | Saw/Metal snips | Cut to measured size | Metal/Wood |
Securing the Panels
Once cut to size, the panels need to be secured to the sides of the cage using wire, zip ties, or screws.
If you are handling a wire cage, cage clips can be used with pliers for a sturdy fit. For a wooden cage, screws will be more appropriate. Ensure that the panels are fastened tightly so that no gaps are left for urine to seep through.
- Zip ties: Create small holes in the metal if it’s not already perforated to thread the zip ties through.
- Cage clips: Use pliers to clamp the clips securely onto the welded wire of the cage.
Applying Finishes
Finally, to prevent corrosion, especially on metal surfaces, finishes such as paint or stain should be applied. Use a rag to apply a non-toxic, animal-safe paint or stain, ensuring it’s completely dry before reintroducing your rabbit to the cage.
- Paint: Go for a waterproof, non-toxic option.
- Stain: A good stain can prolong the life of wooden guards.
Remember, your furry friend’s health comes first, so it’s crucial to use materials that are safe for rabbits. As a vet, I’ve seen firsthand the difference a well-assembled urine guard can make in maintaining a rabbit’s living space and wellbeing.
Installation Techniques
Installing a urine guard in your rabbit’s cage effectively keeps the area clean and ensures that waste is properly managed. Your approach to installation can make a difference in its functionality.
Attaching to the Rabbit Cage
Tools You’ll Need:
- Pliers
- Wire or zip ties
- Utility knife (optional)
Steps:
- Cut the Material: If using flashing or another material, cut it to a height of 4-1/4 inches.
- Place the Guards: Attach the urine guards inside the cage, particularly along the sides where your rabbit urinates.
- Secure the Guards: Use pliers to twist wire or zip ties through pre-made holes, securing the guard to the cage.
From my experience as a vet, improperly attached guards can harm rabbits. Always ensure there are no sharp edges exposed.
Adjustments and Troubleshooting
Common Issues:
- Urine leakage
- Loose guards
- Exposed sharp edges
Solutions:
| Issue | Solution |
|---|---|
| Urine Leakage | Double-check that the guards are snug against the cage walls. |
| Loose Guards | Re-tighten wire or zip ties with pliers; replace if necessary. |
| Exposed Sharp Edges | Use a utility knife to smooth out or file down any sharp areas. |
After installation, observe your rabbit to ensure they are comfortable and that the urine is being directed appropriately. It may take some testing and adjustments to get things perfect. If you have any concerns, it’s always a good idea to consult with a specialist.
Short, concise paragraphs facilitate better comprehension and retention of the installation steps. Utilize the tables and lists to help you keep track of tools and steps throughout the process.
Maintenance and Care
Ensuring the longevity of your rabbit cage and the health of your pets requires regular maintenance and care. Focus on proactive measures to keep both the urine guard and the cage itself in top condition.
Cleaning and Sanitation
Your rabbit’s hygiene is paramount for its well-being.
Urine guards are beneficial for keeping waste contained, but they need frequent cleaning to prevent odors and bacteria growth.
Using a mixture of vinegar and water, clean the urine guards at least once a week.
For plastic guards, a solution of mild detergent and water works well, while metal guards may require a rust-resistant cleaner. Always rinse thoroughly to remove any cleaning solution residue.
| Materials | Frequency | Method |
|---|---|---|
| Vinegar and Water | Weekly | Spray and Wipe |
| Mild Detergent | As Needed | Scrub and Rinse |
| Rust-resistant cleaner | For metal guards | Apply and Polish |
Routine Inspections
Check the urine guards and cages for signs of wear or damage every time you clean them.
Look for any sharp edges on metal guards that could harm your rabbit or any signs of chewing on plastic or wood guards. Safety is a priority, so address any issues immediately.
- Metal Edges: File Down Sharpness
- Chewed Areas: Reinforce with Safe Materials
- Loose Fittings: Secure with Durable Tape
Repair and Replacement
Sometimes a thorough cleaning isn’t enough if your urine guard is damaged. In such cases, consider replacing or repairing it.
Wooden components can rot or become too soiled, and plastic may crack. Metal guards can become bent or rust over time.
Keep spare materials on hand and familiarize yourself with the process of cutting and attaching new sections.
- Wood: Replace when rotted or excessively chewed
- Plastic: Replace if cracked or broken
- Metal: Repair bends, replace if rusted
Remember, the health of your rabbit depends on the cleanliness and condition of its home. Regular maintenance not only preserves the cage but also ensures a safe and hygienic space for your pet.
Additional Considerations
When integrating urine guards into your rabbit’s cage, it’s crucial to consider how they will interact with existing cage accessories and their impact on the overall look of the habitat.
Cage Accessories Integration
Your rabbit’s comfort and the ease of maintenance are key. Urine guards should be installed in a way that doesn’t hinder access to essential items like the litter pan, toys, and shade. Ensure that the guards are:
- Securely fitted to avoid gaps
- Positioned to allow for easy cleanup
For instance, if your rabbit enjoys a particular corner for its litter pan, place the guard in a way that still allows them to comfortably enter and exit the pan. Here is an example of how to align the urine guard with cage accessories:
| Cage Accessory | Urine Guard Integration |
|---|---|
| Litter Pan | Guard should not block the entrance to the pan. |
| Toys | Install guards behind toys to prevent urine splashback. |
| Shade | Ensure guards do not obstruct shaded areas. |
Aesthetics and Customizations
The appearance of your rabbit’s home is equally significant. You may want to decorate the cage to make it more appealing.
When choosing materials for your DIY urine guards, consider using flashing that complements the cage’s color. It’s practical and can be quite attractive. Here’s how:
- Choose a color that matches or enhances the cage’s finish.
- If you are using metal flashing, it can be painted to suit your aesthetic preference.
Moreover, regular maintenance should include checking that any customizations have not been altered by your furry friend. Occasionally rabbits will try to nibble on different cage parts, so inspect the guards to ensure they remain safe and intact.
Advanced DIY Tips and Tricks
In this section, you’ll learn how to use professional building techniques and innovative materials to create a urine guard that not only serves its purpose but also boasts originality and durability.
Expert Building Techniques
When constructing a urine guard for your rabbit’s cage, precision and craftsmanship are key.
Measure twice before you cut, ensuring each piece fits snuggly to prevent leaks. If you’re sewing fabric guards, use a tight zigzag stitch to prevent fraying and create a water-resistant barrier.
- Adjustments: Be prepared to make tweaks. Even a millimeter can make a difference in preventing urine seepage.
- Carpentry: Use waterproof wood glue and stainless-steel staples when combining wooden elements. These materials resist wear and tear.
Tip from a Vet: During my practice, I’ve observed rabbits appreciate a clean environment just as we do. Properly installed urine guards can significantly reduce the spread of urine and contribute to your rabbit’s wellbeing.
Innovative Uses of Materials
Finding the right materials can turn your DIY project from functional to exceptional. Use corrosion-free metals like aluminum or stainless steel for longevity.
- Originality: Consider using Plexiglas for a clear barrier that allows you to monitor your rabbit’s health.
- Technology: Incorporating a small gap at the bottom of rigid guards can funnel urine into a removable catching system—a simple yet effective technology integration.
| Material Type | Properties | Pros | Cons |
|---|---|---|---|
| Metal | Durable, Easy to clean | Long-lasting, Resists chewing | Heavier, May require special tools to cut |
| Plexiglas | Transparent, Easy to work with | Simplifies monitoring, Light-weight | Can scratch over time, May require additional support |
Fun Fact: I once helped a client who used a clever combination of canvas and waterproof liners, showcasing that originality can sometimes lead to the best repair strategies.
Final Thoughts
As you finalize your DIY urine guard project, it’s important to reflect on the process and the benefits it offers to your rabbit’s hygiene and your cage maintenance routine.
Review of Key Points
Rabbit cages benefit significantly from the addition of homemade urine guards. It’s clear that DIY projects like this contribute not only to cleaner living spaces for your pets but also to a more pleasant environment for you. Implementing your own urine guard encompasses several key steps which include:
- Measuring your cage dimensions accurately.
- Choosing the right materials, such as flashing or plastic sheets.
- Cutting the materials to fit the sides of the cage.
- Securing the guards to the cage with a focus on safety and stability.
Through testing and review, you’ve ensured that the guards effectively reduce spillage and maintain a hygienic space. Here’s a quick checklist to help you cover all the essentials:
| Steps | Description |
|---|---|
| Measurement | Obtain precise dimensions of each cage side. |
| Material | Select appropriate, safe, and durable materials. |
| Construction | Cut and form guards to exact measurements. |
| Installation | Fasten guards securely, preventing sharp edges. |
| Testing | Check for leaks and adjust as necessary. |
Encouragement for DIY Enthusiasts
As a vet specializing in rabbits, I’ve seen countless lifestyle benefits to implementing DIY urine guards.
Not only is it a cost-effective solution, but the customization allows for a perfect fit for your specific cage.
Remember, as you embark on these projects, your skill set grows, leading to more advanced and fulfilling do it yourself endeavors. Here’s a couple tips to keep you inspired:
- Celebrate each victory, no matter how small it may seem. Every improvement you make enriches your rabbit’s life.
- Share your success. Hearing from others can be the encouragement someone needs to launch their own project.
Take pride in your finished project knowing you’ve enhanced your rabbit’s lifestyle with a cleaner, healthier habitat.
FAQs
What materials do I need to make a DIY urine guard for my rabbit cage? You’ll require materials such as galvanized sheet metal or flashing, tin snips for cutting, and cage clips or pliers for installation. As a vet, I often recommend using materials that are easy to clean to maintain hygiene.
How high should the urine guard be? Ideal height is about 4-5 inches. This height is sufficient to prevent urine from spraying out while not being too high to cause discomfort to your rabbit.
Where should I place the urine guard in the cage? Position it on the inside of the cage, around the lower part where your rabbit tends to urinate, typically in a corner. Make sure it’s secure to avoid any sharp edges exposing.
Can I make a urine guard without metal? Yes, it’s possible. Some use heavy-duty plastic sheets cut to size. Always ensure the edges are smooth to prevent injury.
How do I attach the urine guard to the cage? Use cage clips to securely attach the guard to the cage wires. Make sure it’s firm to prevent your rabbit from dislodging it.
Do I need special tools to install a urine guard? Basic tools like tin snips for cutting metal and a pair of pliers for bending and attaching it with clips are generally sufficient. Remember, safety first! Wear gloves to protect your hands.
Should the urine guard cover the entire cage perimeter? It’s not necessary. Covering just the areas prone to urine spray is usually adequate. As someone who’s treated many bunnies, I find this minimizes stress for your pet and work for you.
Table: DIY Urine Guard Quick Guide
| Requirement | Purpose |
|---|---|
| Material (metal or plastic) | Forms the barrier |
| Height (4-5 inches) | Prevents spray |
| Placement (lower cage areas) | Targets urine zones |
| Security (cage clips) | Ensures stability |
Remember, your rabbit’s comfort and safety are paramount. If ever in doubt, consult a vet or a professional for advice.